
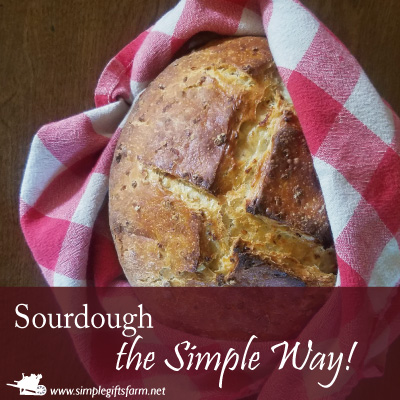
Easy and Simple Sourdough!
I have played around with sourdough off and on for many years. Growing up my mom always had her starter which she tended to faithfully.
I probably started my sourdough journey with my mom’s starter, but I don’t really remember. I do remember that at some point, probably in my later teens, I got ambitious and ordered some special Italian sourdough cultures online in hopes of creating something a little more interesting than the rather dense, wheat loaves we usually made.
I had fun with that starter for a while but never felt like I got into a good rhythm and eventually when I got married and moved away my starter went bad.
Later I was given a lovely started from a proffessional baker who was closing up shop. Sadly I also failed to keep that starter going.

This past year I wanted to get started with sourdough again. So this time I made my own starter! Starting with catching a wild yeast can be a bit tricky as some will be nicely flavored and some can taste quite terrible. Getting a bit of starter from someone else is probably the easiest way to go.
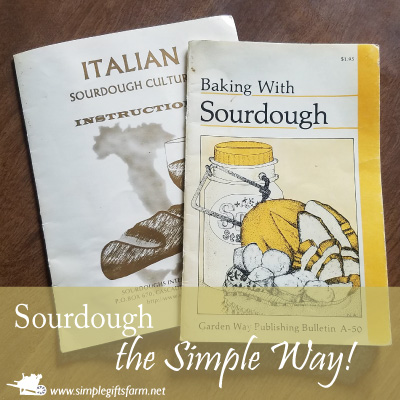
However, I was determined to at least try the wild method. I followed the simple instructions in the Baking With Sourdough booklet from Garden Way Publishing and I was happy to catch a great wild yeast on the first try!
These two books have been helpful in my sourdough journey and both of the recipes below are loosely based on recipes from these books. You can find Baking with Sourdough on Amazon and the other booklet came with Italian Cultures from Sourdough International.
Once I had my starter going well, I didn’t want to be always taking care of it. The last time I had a starter I felt like I was feeding it everyday and that there was always so much wasted each time. I didn’t want to be that commited to it. So after baking my first bread I stuck it in the fridge.

The next time I wanted to bake I realized that I had forgotten to take it out and feed it the night before. So I improvised and my easy sourdough method was born*. It basically has 4 simple steps. Each step takes about 5-10 minutes of hands on time, the rest of the time is just waiting for the dough to do its own thing. I find it easiest to bake bread on days I am home, but the steps could be timed around other activities by allowing longer resting and rising times. The only part of the procces that is specific about timing is the final rise and of course the baking. The four basic steps are:
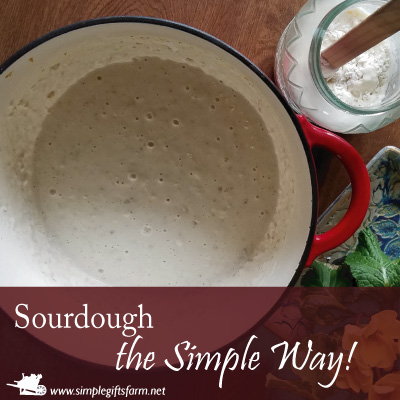
- First thing in the morning take out the starter. Place 1 cup of starter in a bowl with 1 cup water and 1 cup flour. I also usually add any leftover cooked cereal in this step. Feed the starter with equal parts flour and water, stir well, and place back in the fridge. Cover the starter in the bowl with a towel and allow to sit for approximately 2 hours.
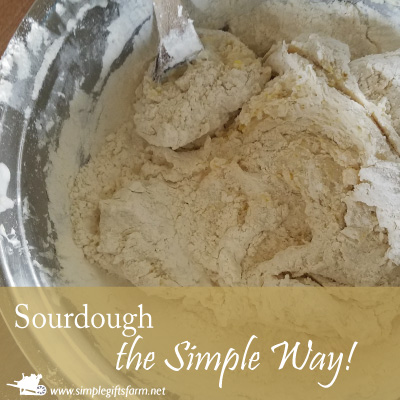
- Add the rest of the ingredients from your chosen recipe, using enough flour to make a firm but not overly dry dough. I like my dough to be a bit on the softer side. Knead dough briefly right in the bowl, form into a ball and cover with the towel. Allow to rise until nearly double. This is usually all afternoon.
- Press dough down, shape into loaves and place into oiled pans. Allow to rise again for about 30 min. to an hour.
- Bake bread according to recipe directions.
*note: this method has worked wonderfully well when I bake at least once a week. If I bake less often the starter separates and needs a bit more attention before baking day.
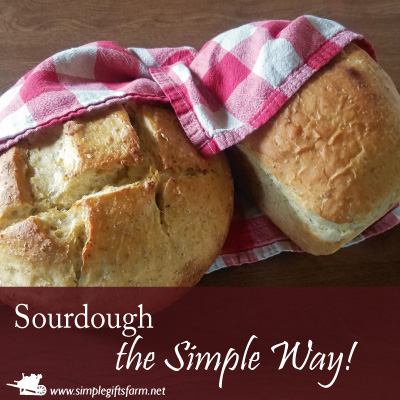
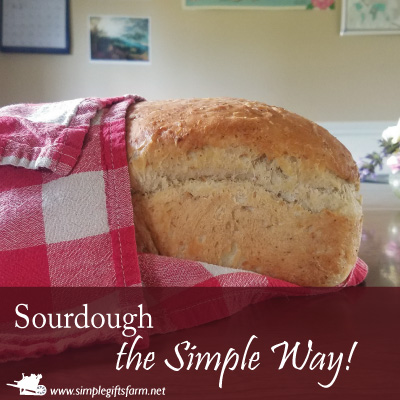
I generally bake two differnent styles of sourdough bread using this method. One is a basic sandwich type loaf and the other is a crusty artisan type loaf.
Here are both recipes for your enjoyment.
Recipe 1: Sourdough Sandwich Bread
Ingredients:
- 1 Cup Sourdough Starter
- 1 cup warm water
- 1 cup unbleached flour
- up to 1 cup of leftover cooked cereal; 10 grain, steel cut oats, and polenta are some I have used(optional)
- 2 Tbsp. melted butter or oil
- 1/4 cup honey or sugar
- 1/3 cup whole wheat flour
- 2 1/2 cups unbleached white flour approximately
Instructions:
Mix the first 4 ingredients in a large bowl. Cover with a towel and allow to sit for at least 2 hours. Add the rest of the ingredients, including enough flour to make a dough you can handle. Once dough has come together into a ball knead it right in the bowl until it is smooth and elastic. Allow dough to rise for several hours. I usually let mine rise all afternoon. When the dough has doubled, punch down and form into a loaf. Place in a greased loaf pan and allow to rise for about 1/2 to 1 hour. Bake in a 350 degree oven for 45 minutes to 1 hour. Loaves should be light brown and sound hollow when done. For an extra soft crust brush the top of the loaf with a bit of butter while still warm!
Recipe 2: Sourdough artisan Loaf

Ingredients:
- 1 Cup Sourdough Starter
- 1 cup warm water
- 1 cup unbleached flour
- up to 1 cup of leftover cooked cereal; 10 grain, steel cut oats, and polenta are some I have used(optional)
- 2 tsp. salt
- 3 cups unbleached white flour
Instructions:
Mix the first 4 ingredients in a large bowl. Cover with a towel and allow to sit for at least 2 hours. Add the rest of the ingredients, including enough flour to make a dough you can handle. Once dough has come together into a ball knead it right in the bowl until it is smooth and elastic. Allow dough to rise for several hours. I usually let mine rise all afternoon. When the dough has doubled, punch down and form into a round loaf. Place in a greased Dutch oven and allow to rise for about 1/2 to 1 hour. Slash top of loafe with a square pattern. Place lid on Dutch oven and bake in a 450 degree oven for 15 minutes. Then turn oven down to 350 degrees and bake for 45 more minutes. Loaf should be brown with a firm crust when done.
A few more tips for taking care of your starter:
- I store my starter in a quart canning jar with a towel rubberbanded on the top. I always keep it in the fridge.
- Every so often I life to transfer my starter to a clean jar simply because it gets messt and hardens around the edges.
- If I go too long between baking and it separates I simply stir it up and feed it extra the night before I plan to bake. If it has turned grey or black I drain the liquid off, stir and feed.
I hope this post has inspired you to try baking with sourdough! Let me know how it goes!
Try this Potato, Leek and Fennel soup with your fresh bread for a perfect cozy meal!


I love this plan for sourdough! Getting ready to start making bread again and I am happy to find out about this easy way of getting the starter up and ready for bread! The recipes look yummy too! Thanks!
Glad you enjoyed the post and recipes. I have been having so much fun with my starter. I just made Challah with it by converting a regular non sourdough recipe.
What a great way to use up leftover oatmeal! I always make a little too much because I don’t want to run out. I LOVE the smell of sourdough bread baking in the oven!
Yes, I am the same way about oatmeal! I always make extra, but hate to waste it!